Speeding Up Skeinforge with PyPy

PyPy 1.5 vs CPython 2.6.6 for Skeinforge

Now that I’ve recovered from Maker Faire, I can continue documenting what I did.  In the lead up to the event, I tried to streamline the FaceCube project as much as possible so visitors wouldn’t have to waste precious Faire time waiting for a print to start.  On the hardware side, I kept the extruder and heated bed warmed up to operating temperature and (literally) hot swapped 4″x4″ pieces of glass so that prints could run back to back.  I updated the FaceCube script to do capture, cleaning, meshing, scaling, and running through OpenSCAD with a single button press.  The remaining bottleneck was running Skeinforge on my geriatric in computer years laptop.  Skeinforge is an amazing utility, but written in Python, it is slower than a drunk sloth.

There are ways of speeding up drunk sloths though.  Psyco is commonly recommended, but does not support 64 bit architectures.  My roommate Will came up with a plan to run a Skeinforge server on PyPy on a faster computer and have a client on my laptop send STLs to it for skeining.  We ran out of time on that, but we did get PyPy running normal Skeinforge on my laptop.  As of PyPy 1.5, there is support for Tkinter.  Following those instructions to install PyPy and Tkinter and run Skeinforge on 64 bit Linux:

wget https://bitbucket.org/pypy/pypy/downloads/pypy-1.5-linux64.tar.bz2
tar -xjvf pypy-1.5-linux64.tar.bz2
cd pypy-c-jit-43780-b590cf6de419-linux64
wget http://peak.telecommunity.com/dist/ez_setup.py
./bin/pypy ez_setup.py
./bin/easy_install tkinter-pypy
./bin/pypy ~/path_to_skeinforge/skeinforge.py

The fonts may look slightly different, but the application should behave the same.  Export times should decrease the first couple of times you put a file through as the JIT compiler optimizes and then stay good as long as you keep the process running.  On my laptop with a 2.00 GHz Core 2 Duo, Skeinforge runs 2 to 3 times faster on PyPy than on stock CPython 2.6.6. The tested objects were a Weighted Storage Cube, a Flower, Whistle v2, and the Prusa Mendel vertex.

1 Comment on Speeding Up Skeinforge with PyPy

Easy Interactive Camera-Projector Homography in Python

Camera and Projector

Math.  It turns out its not quite like riding a bike.  A year since college, and two since my last computer vision course, my knowledge of linear algebra is basically nil.  Several projects I’m stewing on are bottlenecked on this.  I decided to relearn some basics and create a tool I’ve wanted for a while, a method to quickly and easily calculate the homography between a camera and a projector.  That is, a transformation that allows you to map points from the camera plane to the display plane.  This opens up a world of possibilities, like virtual whiteboards and interactive displays.

I won’t go into detail about deriving the transformation matrix, as there is information elsewhere better than I could present.  The calculation requires four or more matching point pairs between the two planes.  Finding the points manually is a pain, so I wrote a script that uses Pygame and NumPy to do it interactively.  The script works as follows:

  1. Point an infrared camera at a projector screen, with both connected to the same computer.
  2. Run the script.
  3. Align an lit IR LED to the green X on the projector screen, and press any key.
  4. Repeat step 3 until you have four points (or more, depending on the script mode), at which point,
  5. The script will calculate the homography, print it out, and save it as a NumPy file.

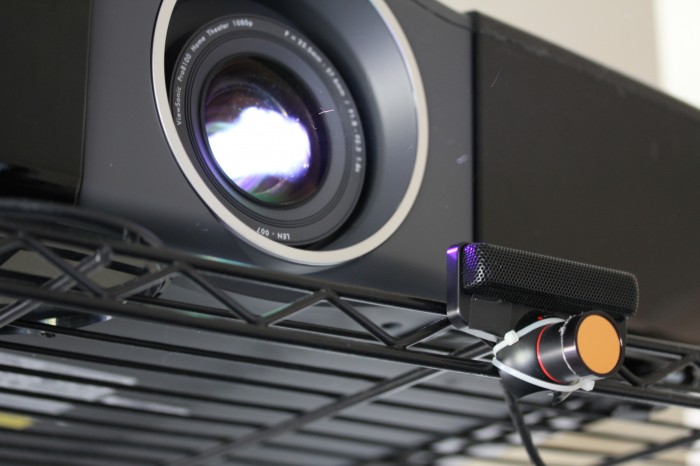
The script in its current form uses any Pygame supported infrared camera.  This today is likely a modded PS3 Eye or other webcam, unless you’re lucky enough to have a Point Grey IR camera.  I do not, so I hot glued an IR filter from eBay to the front of my Eye, that I may have forgotten to return to CMU’s ECE Department when I graduated.  Floppy disk material and exposed film can also function as IR filters on the cheap,  just be sure to pop the visible light filter out of the camera first.

It would be overly optimistic of me to believe there are many people in the world with both the hardware and the desire to run this script.  Luckily, due to the magic of open source software and the modularity of Python, individual classes and methods from the file are potentially useful.  It should also relatively straightforward to modify to accept other types of input, like a regular webcam with color tracking or a Wii Remote.  I will add the latter myself if I can find a reasonable Python library to interface one with.

Once you have the transformation matrix, you can simply dot the matrix with the point from the camera to get the corresponding point on the projector.  The blackboard script, demonstrated by my roommate above and downloadable below shows a use case for this, a drawing app using an IR LED as a sort of spray can.  The meat of it, to convert a point from camera to projector coordinates, is basically:

# use homogeneous coordinates
p = numpy.array([point[0],point[1],1])
# convert the point from camera to display coordinates
p = numpy.dot(matrix,p)
# normalize it
point = (p[0]/p[2], p[1]/p[2])

The homography.py script takes the filename of the matrix file to output to as its only argument.  It also has an option, “-l”, that allows you to use four or more points randomly placed around the screen, rather than the four corner points.  This could come in handy if your camera doesn’t cover the entire field of view of the projector.  You can hit the right arrow key to skip points you can’t reach and escape to end and calculate.  The blackboard.py script takes the name of the file the homography script spits out as its only argument.  Both require Pygame 1.9 or newer, as it contains the camera module.  Both are also licensed for use under the ISC license, which is quite permissive.

nrp@Mediabox:~/Desktop$ python homography.py blah
First display point (0, 0)
Point from source (18, 143). Need more points? True
New display point (1920, 0)
Point from source (560, 137). Need more points? True
New display point (0, 1080)
Point from source (32, 446). Need more points? True
New display point (1920, 1080)
Point from source (559, 430). Need more points? False
Saving matrix to blah.npy
 array([[  3.37199729e+00,  -1.55801855e-01,  -3.84162860e+01],
       [  3.78207304e-02,   3.41647264e+00,  -4.89236361e+02],
       [ -6.36755677e-05,  -8.73581448e-05,   1.00000000e+00]])
nrp@Mediabox:~/Desktop$ python blackboard.py blah.npy

Download:
homography.py
blackboard.py

6 Comments on Easy Interactive Camera-Projector Homography in Python

Easy Absolute Orientation: PNI SpacePoint Fusion in Python

SpacePoint Fusion

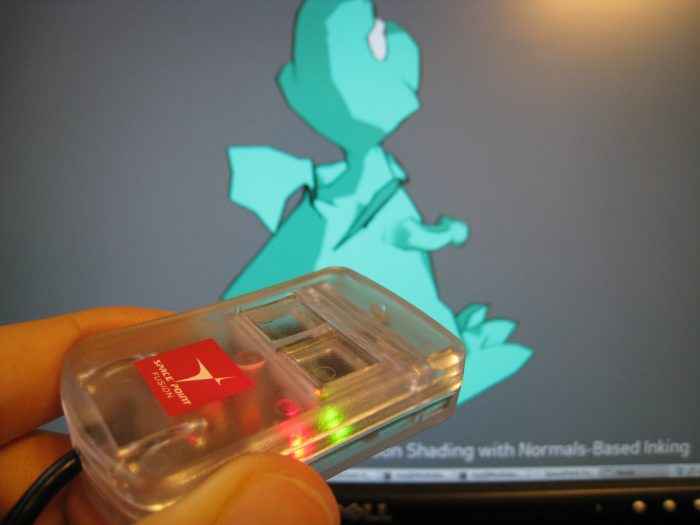
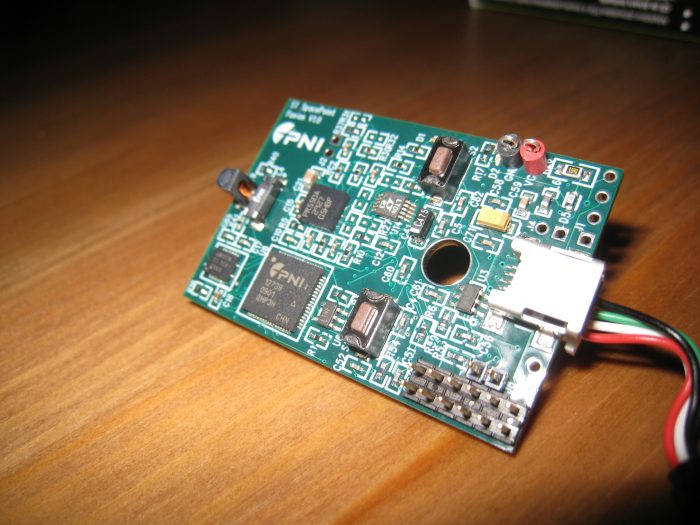
My college roommate Donnie mentioned the PNI SpacePoint Fusion in comments of the HMC5843 post, and it seemed too good to be true.  A 9 DOF controller (3 axes each of magnetometer, accelerometer, and gyro) with a Kalman filter to calculate a smooth quaternion that interfaces as a USB HID device, all for under $100.  I’d be surprised if PNI is making any profit on it.  I sound more like a shill than I’m normally comfortable with, but I’m truly impressed with this gadget. I have some plans for it involving a Microvision SHOWWX that I’m quite excited about; I’ll write more on that when it’s available in a couple of months.

SpacePoint Fusion Innards

PNI provides some Windows only sample apps that show off how weirdly stable and precise the SpacePoint Fusion is.  Luckily, since it’s a normal USB HID device (redundant, I know), and PNI provides application notes, it’s easy to use on any platform.  I wrote a Python module that uses libhid via python-hid to make it easy to prototype with in Linux.  The usage is pretty simple, as shown below.  Note that when plugging the device in, you need to keep it still for a few seconds while the gyros are calibrated.  After that, the quaternion, accelerometer, and button data can be updated 62.5 times a second.

>>> import spacepoint
>>> fusion = spacepoint.SpacePoint()
>>> print repr(fusion.quat)
(0.987518310546875, -0.04425048828125, -0.04119873046875, 0.145294189453125)
>>> print repr(fusion.accel)
(-0.054016113354999999, 0.018859863306999999, -0.89648437622400001)
>>> print repr(fusion.buttons)
(0, 0)
>>> fusion.update()
>>> print repr(fusion)
accel: (-0.054016113354999999, 0.018859863306999999, -0.89648437622400001)
 quat: (0.97186279296875, -0.233428955078125, -0.030548095703125, 0.005401611328125)
 buttons: (0, 0)

Update on February 7, 2010: I emailed PNI about a bug in the firmware, and got the following response:

Thank you for submitting the SpacePoint bug regarding libusb, Python, and Linux. You’re right! There is a bug in the SpacePoint FW that prevented opening interface 1 without opening interface 0 when using libusb under Linux. While your work around was effective in allowing the device to operate normally, one should be able to open interface 1 directly without the work around. We were able to use your Python source code to quickly diagnose and repair the bug. Please see the attached for the modified Python script. Please feel free to post this paragraph, the modified code, and all bragging rights on your blog (https://eclecti.cc/).

Units being shipped now have the fix. I modified the Python module to handle units both with and without the firmware fix and bumped the version to 0.2.

Download:
SpacePoint Python Module
or
Standalone spacepoint.py

Setting udev rules to get the permissions right

In most cases, the module will just work properly.  However, if you get the following error, you probably don’t have the right permissions to access the usb device.

>>> import spacepoint
>>> fusion = spacepoint.SpacePoint()
hid_force_open failed with return code 12.

On most modern Linux distros, you can fix this by setting a udev rule for the device. In Ubuntu Karmic Koala, saving the following as /etc/udev/rules.d/45-spacepoint.rules , running sudo service udev restart , and then unplugging and replugging in the device should fix it:

# PNI SpacePoint Fusion
SYSFS{idVendor}=="20ff", SYSFS{idProduct}=="0100", MODE="0664", GROUP="admin"
11 Comments on Easy Absolute Orientation: PNI SpacePoint Fusion in Python

Deep Sheep: A Global Game Jam Entry

Deep Sheep

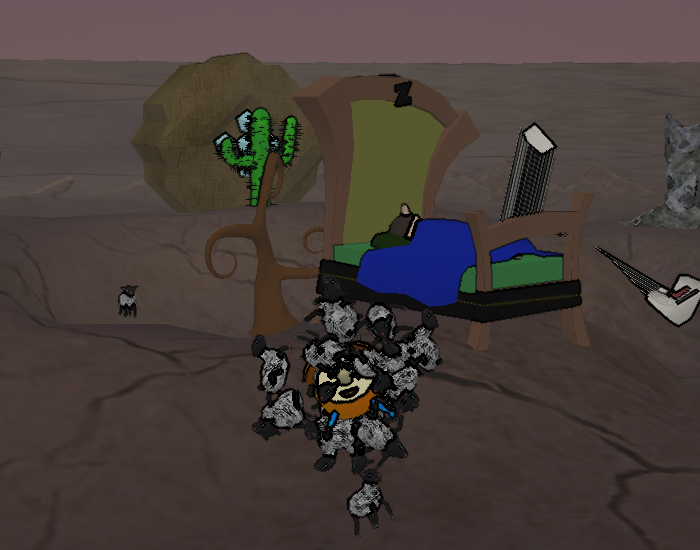
I spent last weekend at the Entertainment Technology Center (ETC) for the Global Game Jam, designing and programming a game about sheep.  The process of coming up with a game concept in our team of 7 randomly thrown together geeks (though we ended the weekend with 5 [attrition, not cannibalism {though I did get pretty hungry from all the coding}]), was quite a whirlwind.  Somehow we started at a blob of mercury and ended with a dream in which you control an alarm clock being chased and covered by bouncy sheep.  The premise is that you’ve fallen asleep counting sheep, which follow you into your dream.  The sheep try to keep you in the dream forever by smothering the alarm clock and preventing it from ringing.  To win, you must knock all of the sheep off of the clock by ramming into obstacles or falling from heights, and then quickly roll back to the bed before any sheep catch up and reattach.  It plays a lot like a reverse Katamari Damacy, though that was not necessarily the intent.

This is the second time I’ve done a 3d game, and this one came out far better than Robobear Apocalypse, an entry for the Wild Pockets Game Jam.  The engine this uses is Panda3D, another product of the ETC.  It was actually quite nice to learn and use, and I was impressed by how well it worked cross-platform.  It helps that it uses regular old Python instead of proprietary languages that seem to be all the rage in game engines today.   I also learned just how nice it was to have modellers/animators on a game project.  Finally a game that isn’t made up of spheres, cubes, and stock models!

You can download the game on its Global Game Jam page.  The .zip on that page contains the source and a Windows installer.  You can also run the source directly in Linux or Windows if you have Panda3D installed.  It seems most distros have it available in their repos, but if not, there are packages downloadable at the Panda3D site.  It’ll run ok on just about anything that isn’t integrated graphics.   The game isn’t perfect and certainly isn’t bug free, but it is a fun light hearted experience and the result of only 48 hours of work.

1 Comment on Deep Sheep: A Global Game Jam Entry

RocketPong – A One Button Game

RocketPong

I couldn’t sleep, so I decided to write a quick entry for the Game Creation Society‘s One Button Game Compo.

It requires Pygame 1.8, which can be installed through a package manager on many distros, or can be downloaded from Pygame.

The game is a pong clone with gravity. The one button activates thrust on your paddle, which happens to look like a rocket. In theory, there is pixel perfect collision detection, so the angle of the ball against the curve of the rocket should matter. The opponent rocket is controlled by some really really horrible AI. The game would be infinitely more fun with two players, but I wasn’t sure if the one button rule meant per player or total…

Update: I uploaded a better version of it with more accurate collision detection and better AI.  There is also a two player mode that is activated by hitting the right arrow key, which is the thrust key for the second player.  This is the final version for the game competition, and very likely the last time I will touch the code.

Download:
rocketpong.tar.gz
rocketpong.zip

No Comments on RocketPong – A One Button Game

Living Pointillism: A pygame webcam script

Living Pointillism

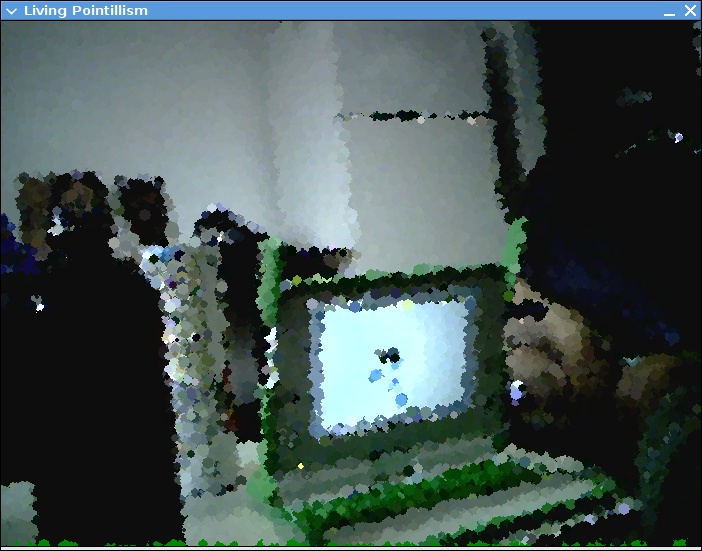
Living Pointillism is a quick little example script I wrote to showcase the camera module I’m writing for pygame through GSoC.  It places a few dozen points (it automatically changes the number based on the framerate) for every frame of video, so the image is only clear if everything is perfectly still.  This also results in some interesting visual effects when things are in motion.  The screenshot above doesn’t quite capture the essence of it, but I don’t have the kind of bandwidth here to upload a video.

To use it, you need pygame with the camera module, which is currently only available from my repository: http://git.n0r.org/?p=pygame-nrp;a=summary

It runs fairly well on the OLPC XO too, and I’ll release an Activity for it along with an rpm of my branch of pygame soon.

Download: Living Pointillism

Update: This is now available packaged as an OLPC Activity.

Update 2: Pygame with the camera module should now be downloaded from the Pygame SVN.

10 Comments on Living Pointillism: A pygame webcam script

PyEyes: xeyes in Python with Face Tracking

PyEyes

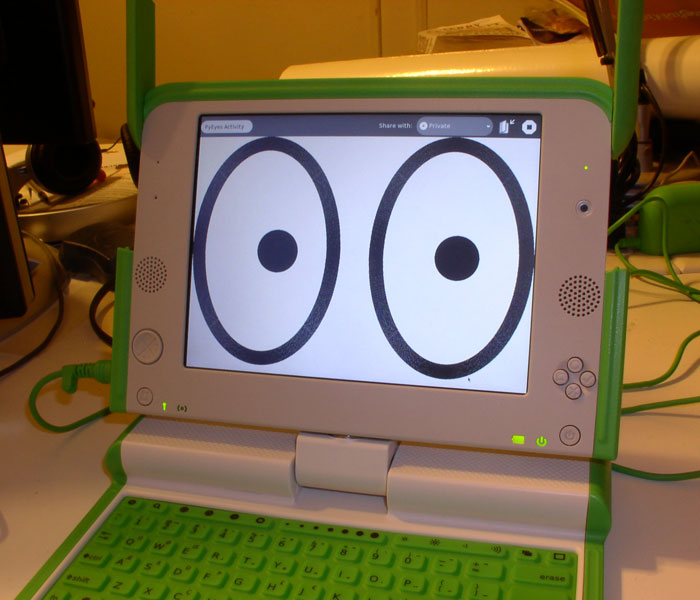
As a crash course in learning the basics of Pygame, I wrote a quick little Activity for the OLPC XO.  It is a clone of xeyes, except instead of following the mouse cursor, it uses the webcam to be creepy and follow your face.  It’s a bit slow, and kind of messy, but I did only make it for learning purposes.

It uses OpenCV, so you’re going to need a version of it that works on the XO.  The latest source from CVS works, or you can install a patched rpm of it that I hacked together:

sudo rpm -i https://eclecti.cc/files/opencv-1.0.0-3olpchack.fc7.i386.rpm

You’ll also need the opencv-python package, which is available in the repository.

sudo yum install opencv-python

You can get the .xo itself here: PyEyes-1.xo

8 Comments on PyEyes: xeyes in Python with Face Tracking