RepRap Controlled Time-Lapse Photography

While capturing the time-lapse last week, John and I ran into two irritating issues.  The first is that the moving platform causes the object being printed to come in and out of the focal plane of the camera and makes for a jarring video.  The second is that because the interval between photos is constant, some large and slow layers will have multiple shots taken while several consecutive quick layers can be skipped entirely.  The solution to both of these is to dynamically remote trigger the camera from the printer.

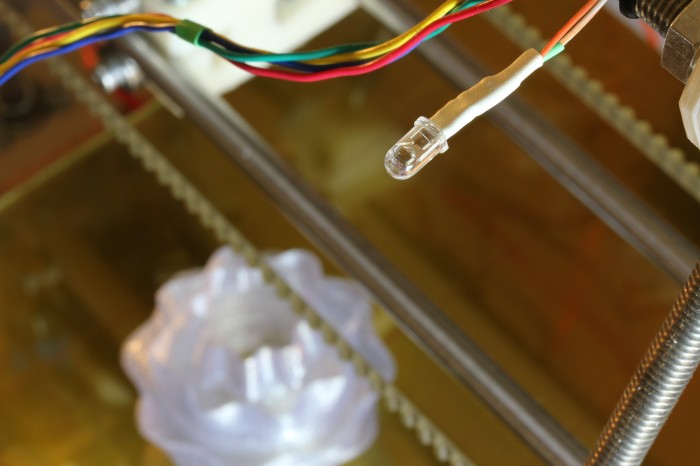
I wrote a Skeinforge photograph plugin that inserts a new G-code command, M240, which tells the printer to trigger a photograph.  The module offers three modes.  End of Layer, as demonstrated by Yoda above, is the simplest.  It takes one picture at the start of the first layer and then another at the end of each layer of the print, resolving only the second of the aforementioned issues.  Corner of Layer takes a picture at the minimum Y,X of each layer.  Least Change between Layers tries to take shots that are as close as possible to each other from layer to layer.  I had the most visually interesting results with the last setting, as shown in the Flower print up top.  The module can be downloaded from github, and installation instructions are included within its text.

Infrared Trigger

The other half of the control scheme is triggering the camera from the RepRap.  Since I didn’t want to risk coupling my T2i directly to the printer, I went for emulating a Canon RC-1 Remote, which has been thoroughly reverse engineered.  The hardware is simply an 850nm infrared LED in series with a 180 ohm resistor connected to one of the I/O pins on the Arduino Mega.  I chose pin 23 because I could solder to it without pulling my RAMPS board off.  The software side is equally simple.  For this, I forked the excellent Sprinter firmware to respond to M240 and send the correct pulse over the IR LED.  My fork is on github, but the diff that adds M240 support is the interesting bit.

2 Comments on RepRap Controlled Time-Lapse Photography

Time-Lapse of a RepRap Print

John visited recently and suggested that we bring another photographic production to the world: this time, a time-lapse of the RepRap printing out an interesting looking object.  After some frustrating attempts to install the Canon EOS Utility, we just used an intervalometer directly on my T2i with the Magic Lantern firmware.  In case you want to try it out and to save me a lot of Googling in the future, here are the mencoder parameters to generate a sanely sized video from high resolution stills.

mencoder -ovc lavc -lavcopts vcodec=mjpeg -mf fps=10:type=jpg -vf scale=960:720 'mf://*.JPG' -o timelapse.avi

Depending on which project gets swapped into my next free time slot, I may have another post soon exploring an extension on this that John and I discussed.

1 Comment on Time-Lapse of a RepRap Print

Snow Globe: Part One, Cheap DIY Spherical Projection

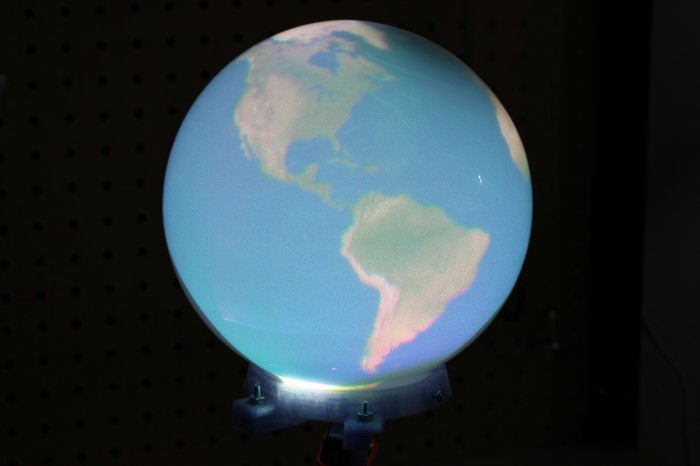
Earth in Snow Globe

Since reading Snow Crash, I’ve been drawn to the idea of having my own personal Earth.  Because I’m stuck in reality and the virtual version of it is always 5 years away, I’m building a physical artifact that approximates the idea: an interactive spherical display.  This is of course something that exists and can likely be found at your local science center.  The ones they use are typically 30-100″ in diameter and cost enough that they don’t have prices publicly listed.  Snow Globe is my 8″ diameter version that costs around $200 to build if you didn’t buy a Microvision SHOWWX for $600 when they launched like I did.
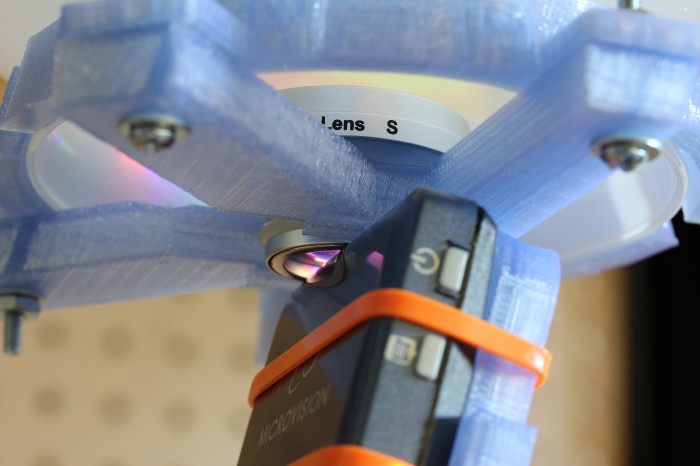
Lens mount

The basic design here is to shoot a picoprojector through a 180° fisheye lens into a frosted glass globe.  The projector is a SHOWWX since I already have one, but it likely works better than any of the non-laser alternatives since you avoid having to deal with keeping the surface of the sphere focused.  Microvision also publishes some useful specs, and if you ask nicely, they’ll email you a .STL model of their projector.  The lens is an Opteka fisheye designed to be attached to handheld camcorders.  It is by far the cheapest 180° lens I could find with a large enough opening to project through.  The globe, as in my last dome based project is for use on lighting fixtures.  This time I bought one from the local hardware store for $6 instead of taking the one in my bathroom.

I’ve had a lot of fun recently copying keys and people, but my objective in building a 3D printer was to make it easier to do projects like this one.  Designing a model in OpenSCAD, printing it, tweaking it, and repeating as necessary is much simpler than any other fabrication technique I’m capable of.  In this case, I printed a mount that attaches the lens to the correct spot in front of the projector at a 12.15° angle to center the projected image.  I also printed brackets to attach the globe to the lens/projector mount.  The whole thing is sitting on a GorillaPod until I get around to building something more permanent.
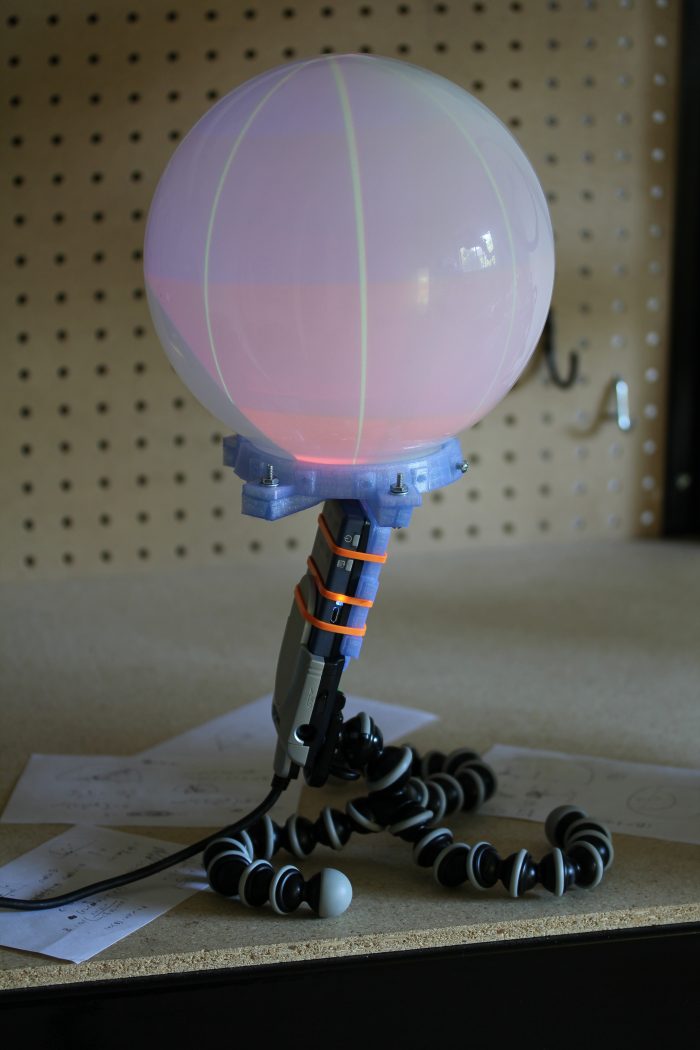
Snow Globe

Actually calibrating a projector with slight pincushion through a $25 lens into a bathroom fixture attached together with some guesswork and a 3D printer is well beyond my linear algebra skill, so I simplified the calibration procedure down to four terms.  We need to find the radius in pixels of the circle being projected and the x and y position of the center of that circle for starters.  The more difficult part, which tested my extremely rusty memory of trigonometry is figuring out how to map the hemisphere coming out of the fisheye lens to the spherical display surface.  For that, we have a single number for the distance from the center of the sphere to the lens, in terms of a ratio of the projected radius.  The math is all available in the code, but the calibration script I wrote is pretty simple to use.  It uses pygame to project longitude lines and latitude color sections as in the image above.  You use the arrow keys to line up the longitude lines correctly to arrive at the x and y position, plus and minus keys to adjust the radius size until it fits the full visible area of the sphere, and 9 and 0 to adjust the lens offset until the latitudes look properly aligned.  What you end up with is close enough to correct to look good, though as you can see in the images, the projector doesn’t quite fit the lens or fill the sphere.  The script saves the calibration information in a pickle file for use elsewhere.

Projected sphere

Going back to the initial goal, I wrote a script to turn equirectangular projected maps of the Earth into roughly azimuthal equidistant projected images calibrated for a Snow Globe like the one above.  There are plenty of maps of the former projection available freely, like Natural Earth and Blue Marble. Written in python, the script is quite slow, but it serves as a proof of concept.  The script, along with the calibration script and the models for the 3D printed mounts are all available on github.  I’ve finally fully accepted git and no longer see a point in attaching the files to these posts themselves.  I put a Part One in the title to warn you that this blog is going to be all Snow Globe all the time for the foreseeable future.  Up next is writing a faster interface to interactively display to it in real time, and if I think of a good way to do it, touch input is coming after that.

Download from github:
git://github.com/nrpatel/SnowGlobe.git

64 Comments on Snow Globe: Part One, Cheap DIY Spherical Projection

For Sale: RepRap Parts for Bitcoins

SAE Prusa Mendel RepRap Parts

Bitcoin is exactly the kind of fantastic real life science fiction kind of project that I enjoy: a peer to peer, anonymous, cryptographically secure currency.  I’m not even an armchair economist, but I suspect the hardest part of starting any new economy is the chicken and the egg problem.  Sellers won’t join the market unless there are potential buyers, and buyers won’t join unless there are people selling things they want to buy.  Unfortunately in the case of Bitcoin, both the chicken and the egg have been eaten by the monster called currency speculation.  It is likely that the majority of actual transactions are between speculators and exchanges, taking advantage of volatility to make a profit in BTC or USD.  Half a paragraph later, I’m still not an economist, but I also suspect that as a larger fraction of the economy goes to goods and services, the currency will stabilize, encouraging more people to use it.  Therefore, I am doing my part in bootstrapping the Bitcoin economy by using a project that loves to bootstrap.

Wade's Extruder and spare parts

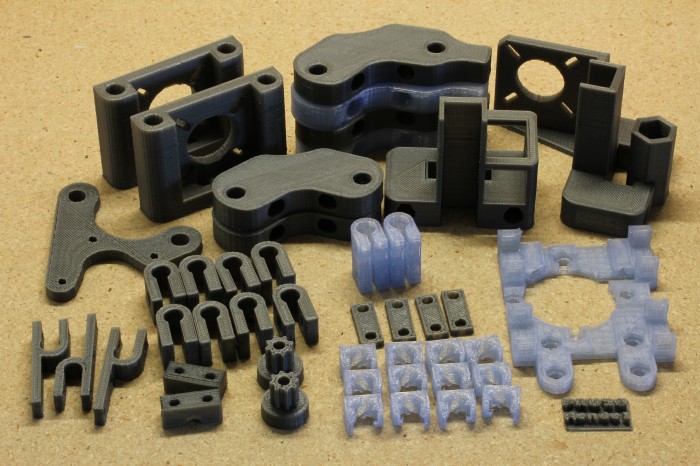
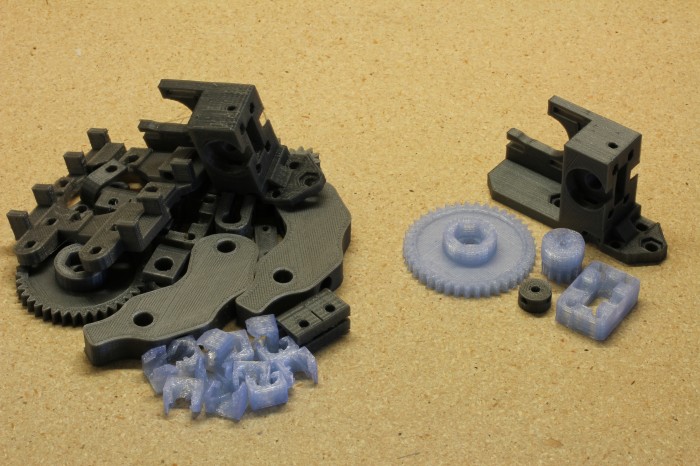
I’m selling a set of SAE Prusa Mendel parts printed on the Mendel used in many of my recent projects.  The parts are from the current files in the PrusaMendel git repository, and are printed in PLA.  They are quite clean and strong, but may need a little work with a knife or drill bit.  The Wade’s Extruder and PLA bushings from the repository are also included.  But wait, there’s more!  Between getting misaligned on the trip home from Maker Faire and a torn belt, my printer was in fairly rough shape for a few weeks.  While repairing it, I printed RepRap parts to test the calibration.  I’m including the usable parts printed during that time and some more good spare parts I printed recently; this is the pile on the left in the bottom picture.  The full set of good parts from the top picture and the Wade’s Extruder are in separate bags.

I’m selling this set for the hopefully reasonable price of 5 BTC, shipped USPS Priority Mail to anywhere in the US.  At the exchange rate at this moment, that is roughly $72.50.  It could be $20 or $200 by tomorrow for all I know, but I’m willing to take the risk if you are.  Email me, and we can arrange the transaction. Sold!  There was less interest than I was hoping for, so I probably won’t be doing it again.

4 Comments on For Sale: RepRap Parts for Bitcoins

Maker Ant Farm: Minecraft Skin Generation with a Kinect

Since my seemingly fragile 3D printer had never left my desk before and even in prime condition could only print an object every 10 minutes or so, I decided that I needed a backup project for the Bay Area Maker Faire last month.  I conscripted Will to help me out on a purely software Kinect based project.  After downscoping our ideas several times as the Faire weekend approached, we eventually settled on generating Minecraft player skins of visitors.  The printer ended up working fine (and more reliably than the software only project), but the Minecraft “Maker Ant Farm” was more of a crowd pleaser.

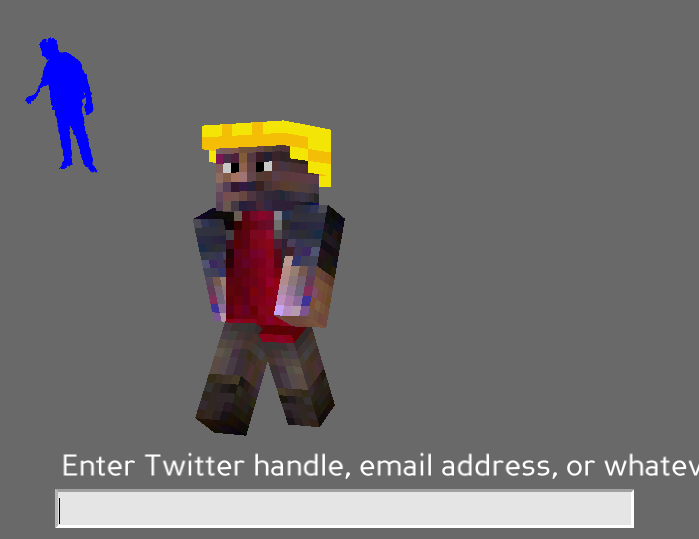
A visitor would stand in front of the Kinect and enter fieldgoal/psi calibration pose.  We used OpenNI and NITE to find their pose and segment them out of the background for a preview display.  Using OpenCV, we mapped body parts to the corresponding sections of the Minecraft skin texture.  Since we could only see the fronts and parts of the sides of a person, we just made up what the back would look like based on the front.  This was of course imprecise and resulted heads that often looked like they had massive bald spots.  Rather than trying to write some kind of intelligent texture fill algorithm on a short schedule, we just gave all of the skins yellow hard hats (not blonde hair, contrary to popular opinion).  After generating the skin, we loaded it back onto ShnitzelKiller’s player rig in Panda3D.  I had planned on writing full skeletal tracking for the rig, but ran out of time and settled on just having it follow the position and rotation of the user and perform an animated walk.  After walking around a bit watching a low res version of him or herself, the user could enter in a Twitter handle or email address to keep the skin.  The blocky doppelgänger was then dropped onto a Minecraft server instance we had running as a bot that did simple things like walk around in circles or drown.

Minecraft Skin

Despite some crashiness in NITE and the extremely short timeframe we wrote the project in, it ended up working reasonably well.  Thanks to the low resolution style and implied insistence on imagination in Minecraft, the players avoid looking like the ghastly zombies in Kinect Me.  You can see examples of some of the generated skins on @MakerAntFarm.  I hate not releasing code, but I almost hate releasing this code more.  It is very likely to be the worst I have ever hacked together, and I can’t help but suspect it will be held against me at some point.  Nonetheless, for the greater good, it’s up on github.  There are vague instructions on how one might use it in the README.  Good luck, and I’m sorry.

No Comments on Maker Ant Farm: Minecraft Skin Generation with a Kinect

Physical Keygen: Now for Disc Detainer Locks

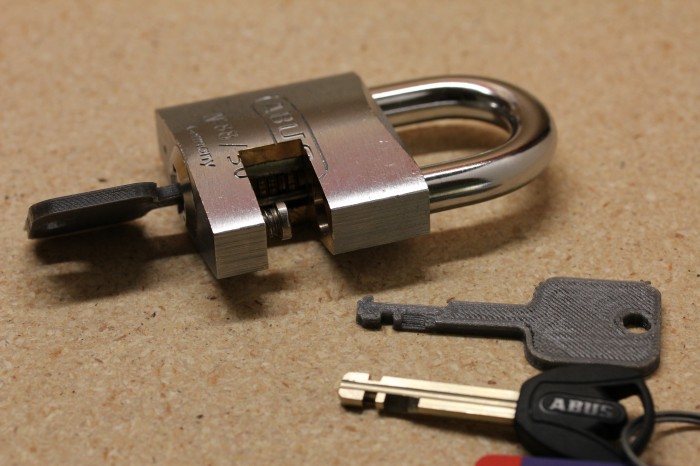
ABUS Plus Disc Lock

The Physical Keygen post got reactions, but there was a common claim among many of them that it was just a gimmick because there are more practical ways of getting past basic Schlage and Kwikset pin tumbler locks.  I agree with that, and I’ll also admit that a fair number of my projects are gimmicks, or as a stretch, art.  Schuyler Towne of Open Locksport saw past the gimmick (or art) and into the possibility of printing keys for more interesting locks.

He stopped by recently with a collection of said locks, and over the period of a few hours we determined that keys for disc detainer locks were printable and created a nearly working ABUS Plus key.  He left me a cutaway lock, and over the next week, I refined the model to the point of working straight off of the printer.  Despite being a higher security lock than the SC1 or KW1 pin tumblers I was working with before, the key is much easier to print accurately.  The OpenSCAD model is linked below, and like the last files, you simply edit the last line to match the code for your key.

The ABUS Plus and other disc detainer locks are much more common in Europe than the US, but we do have a pretty ubiquitous example around here.  After the Bic Pen debacle in 2004, Kryptonite switched their bicycle U-locks from tubular to disc detainer.  I designed a model off of the key from the Kryptonite Evolution I have, but as of yet, I have not successfully opened the lock with it.  The key is smaller and thinner than the ABUS Plus, causing it to flex too much to effectively turn the last few discs.  I’ve posted the file anyway, in case someone has stronger plastic or an idea to strengthen the model.

Edit: The Kryptonite key works. I tightened my X and Y belts and printed it a bit slower. Apparently some of the blobbing on the corners before was catching on disks.

Download:
abus_plus.scad
kryptonite.scad

2 Comments on Physical Keygen: Now for Disc Detainer Locks

Physical Keygen: Duplicating House Keys on a 3D Printer

3D Printed House Key

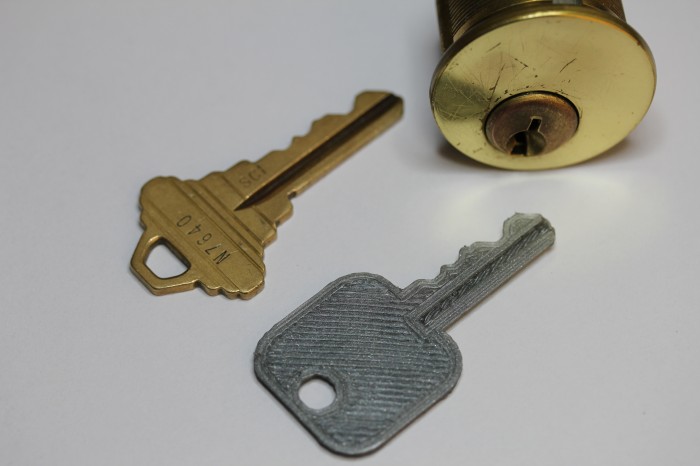
It occurred to me recently that I had printed almost nothing actually useful on my RepRap 3D printer, aside from parts to improve on or build more RepRaps.  I am rectifying that with this project.  The goal here is to generate working house keys by inputing the key code of the lock into a parametric OpenSCAD model.  Instead of having to explain to my landlord how I ended up with a wedge of plastic jammed in my front door, I ordered a box of (well) used locks and latches from eBay to experiment on.  Luckily, the lot includes both Kwikset KW1 and Schlage SC1 locks, which are the two most commonly found in the US.  I created an SC1 model to start with, but I’ll probably make a KW1 soon.  I’ve uploaded the KW1 model now as well.

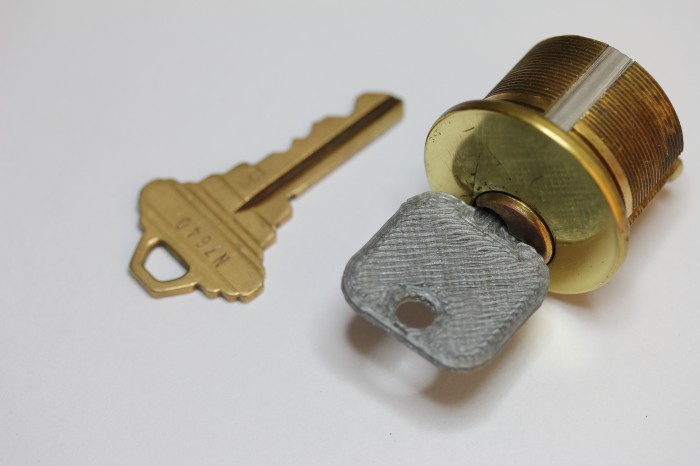
Key in Lock

Designing the key model was actually pretty straightforward.  I measured a key with a ruler and calipers and created an approximate model of it that is reasonably easy to print.  I then got pin depth specifications and parametrically differenced them out of the model.  To generate new keys, you can just edit the last line of the file and enter in the key code for your key.  If the code isn’t written on the key, you can measure the height of each bit and compare to the numbers in the Root Depth column on the aforementioned pin depth site.  Perhaps more nefariously, you could implement something like SNEAKEY to generate key codes without physically measuring the key.

You’ll of course need OpenSCAD to edit the .scad file and generate an STL to print out, unless your key just happens to be 33172 like the example STL posted below.  If it is, you can unlock the doorknob currently sitting on my desk.  As a small, precise object, this is a great test of how accurate your Skeinforge settings are.  You may need to adjust some thicknesses or the built in pin depth fudge factor to get it working properly with your printer.  The pictures above show the key being used on a disconnected lock cylinder, but I found it was also strong enough to turn a deadbolt.  If your lock needs a lot of force to turn, you may need to cut a space into the key to use a torsion wrench with it.

Download:
sc1.scad
sc1.stl
kw1.scad
kw1.stl

52 Comments on Physical Keygen: Duplicating House Keys on a 3D Printer

Speeding Up Skeinforge with PyPy

PyPy 1.5 vs CPython 2.6.6 for Skeinforge

Now that I’ve recovered from Maker Faire, I can continue documenting what I did.  In the lead up to the event, I tried to streamline the FaceCube project as much as possible so visitors wouldn’t have to waste precious Faire time waiting for a print to start.  On the hardware side, I kept the extruder and heated bed warmed up to operating temperature and (literally) hot swapped 4″x4″ pieces of glass so that prints could run back to back.  I updated the FaceCube script to do capture, cleaning, meshing, scaling, and running through OpenSCAD with a single button press.  The remaining bottleneck was running Skeinforge on my geriatric in computer years laptop.  Skeinforge is an amazing utility, but written in Python, it is slower than a drunk sloth.

There are ways of speeding up drunk sloths though.  Psyco is commonly recommended, but does not support 64 bit architectures.  My roommate Will came up with a plan to run a Skeinforge server on PyPy on a faster computer and have a client on my laptop send STLs to it for skeining.  We ran out of time on that, but we did get PyPy running normal Skeinforge on my laptop.  As of PyPy 1.5, there is support for Tkinter.  Following those instructions to install PyPy and Tkinter and run Skeinforge on 64 bit Linux:

wget https://bitbucket.org/pypy/pypy/downloads/pypy-1.5-linux64.tar.bz2
tar -xjvf pypy-1.5-linux64.tar.bz2
cd pypy-c-jit-43780-b590cf6de419-linux64
wget http://peak.telecommunity.com/dist/ez_setup.py
./bin/pypy ez_setup.py
./bin/easy_install tkinter-pypy
./bin/pypy ~/path_to_skeinforge/skeinforge.py

The fonts may look slightly different, but the application should behave the same.  Export times should decrease the first couple of times you put a file through as the JIT compiler optimizes and then stay good as long as you keep the process running.  On my laptop with a 2.00 GHz Core 2 Duo, Skeinforge runs 2 to 3 times faster on PyPy than on stock CPython 2.6.6. The tested objects were a Weighted Storage Cube, a Flower, Whistle v2, and the Prusa Mendel vertex.

1 Comment on Speeding Up Skeinforge with PyPy

Gestural Printing: Jumping the Shark on Kinect Hacks

We’ve seen a seemingly endless array of amazing Kinect hacks over the last few months, from superhero generators to obstacle avoiding quadcopters.  However, it was only a matter of time before someone came up with a hack so inane and irrelevant that it would bring shame to the entire hobby.  That time is now, and that someone is me.  I bring to you, gestural 3D printing!  Using the Kinect to track your hand, you can draw one layer at a time, with the printer following your every move.  Pushing forward extrudes plastic, while pulling your hand back will start a new layer.  Who needs difficult and confusing CAD software when you can just directly draw the object you want to print?

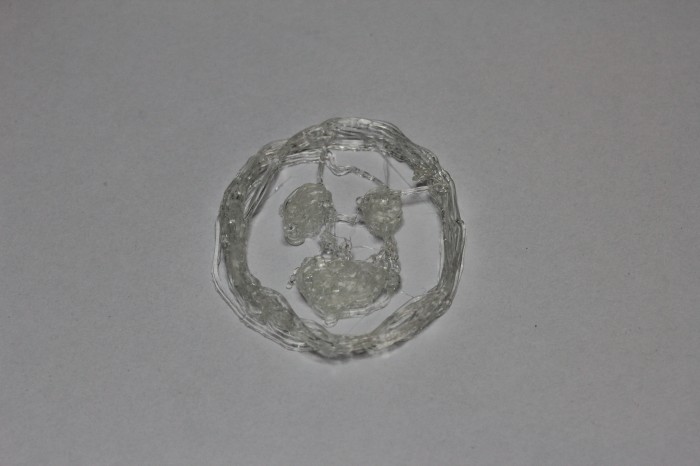
Really though, you can only get through 4 or 5 layers before your arm feels like it’s going to fall off, and the resulting object will look like a stringy blob of plastic vomit.  The source is in the FaceCube GitHub repository.  I don’t recommend actually using it, but if for some reason you want to, the dependencies are mindbogglingly complex.  You’ll need to install OpenNI and NITE to start with; this guide at Keyboardmods is helpful.  You’ll also need my branch of OSCeleton, which improves on hand tracking.  With the Kinect hooked up, you can run ./osceleton -n -f to start hand tracking in an Open Sound Control server.  You can then run the gestureprinter.py script, which requires pyOSC, pygame, and the RepRapArduinoSerialSender script from Skeinforge, which is also in the FaceCube repository.  Of course, you’ll also need both a Kinect and a 3D printer that is compatible with the Gcode that RepRap firmwares use.  The script is set up for my printer specifically, but it should be straightforward to tweak for others if you dare.

Gestural Print

No Comments on Gestural Printing: Jumping the Shark on Kinect Hacks