FaceCube: Copy Real Life with a Kinect and 3D Printer

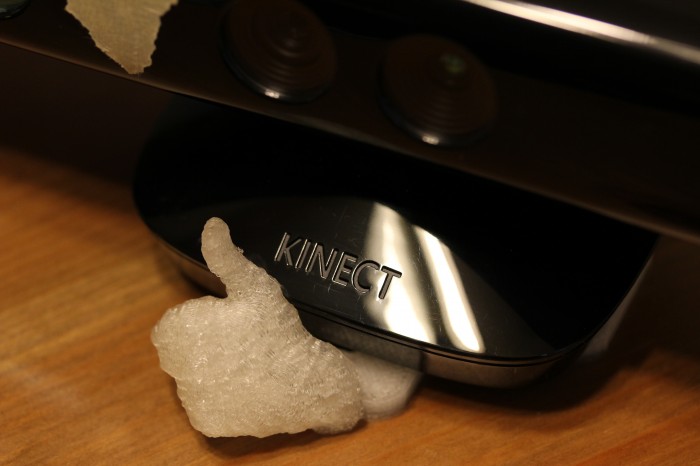
Thumbs Up

This project is a tangent off of something cool I’ve been hacking on in small pieces over the last few months.  I probably would not have gone down this tangent had it not been for the recent publication of Fabricate Yourself.  Nothing irks inspires me more than when someone does something cool and then releases only a description and pictures of it.  Thus, I’ve written FaceCube, my own open source take on automatic creation of solid models of real life objects using the libfreenect python wrapper, pygame, NumPy, MeshLab, and OpenSCAD.

The process is currently multi-step, but I hope to have it down to one button press in the future.  First, run facecube.py, which brings up a psychedelic preview image showing the closest 10 cm of stuff to the Kinect.  Use the up and down arrow keys to adjust that distance threshold.  Pressing spacebar toggles pausing capture to make it easier to pick objects.  Click on an object in the preview to segment it out.  Everything else will disappear; clicking elsewhere will clear the choice.  You can still use the arrow keys while it is paused and segmented to adjust the depth of what you want to capture.  You can also use the H and G keys to adjust hole filling to smooth out noise and fill small holes in the object.  If the object is intended to have holes in it, press D to enable donut mode, which leaves the holes open.  Once you are satisfied, you can press P to take a screenshot or S to save the object as a PLY format point cloud.

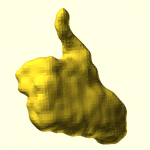
FaceCubeSegmentedPoint Cloud

You can then open the PLY file in MeshLab to turn it into a solid STL.  I followed a guide to figure out how to do that and created a filter script attached below.  To use it, click Filters -> Show current filter script, click Open Script, choose meshing.mlx, and click Apply Script.  You may have to click in the preview, but after a few seconds, it will say that it Successfully created a mesh.  You can click Render -> Render Mode -> Flat Lines to see what it looks like.  You can then click File -> Save As, and save it as an STL.  You can probably get better results if you manually pick the right filters for your object, but this script will be enough most of the time.

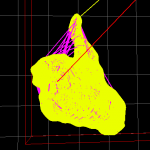
MeshLabOpenSCADRepsnapper

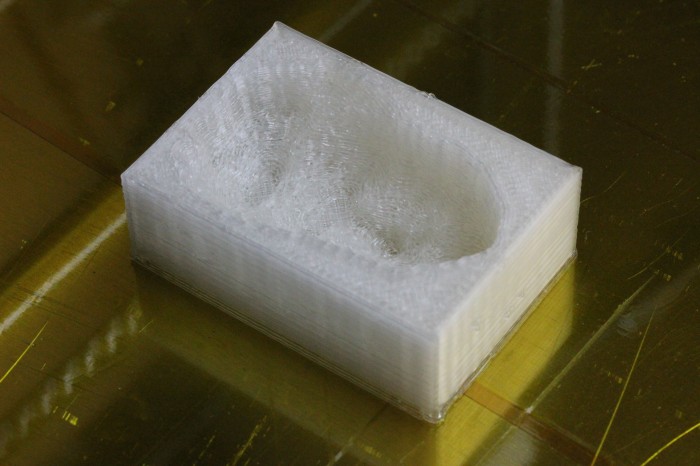
You can then open the STL in OpenSCAD or Blender and scale it and modify to your heart’s (or printer’s) content.  Of course, the real magic comes from when you take advantage of all that OpenSCAD has to offer.  Make a copy of yourself frozen in carbonite, put your face on a gear, or make paper weights shaped like your foot.  This is also where the name FaceCube comes from.  My original goal going into this, I think at my roommate’s suggestion, was to create ice cube trays in the shapes of people’s faces.  This can be done very easily in OpenSCAD, involving just subtracting the face object from a cube.

difference() {
	cube([33,47,17]);
	scale([0.15,0.15,0.15]) translate([85,140,120]) rotate([180,0,0]) import_stl("face.stl");
}

FaceCube Tray

Since all of the cool kids are apparently doing it, I’ve put this stuff into a GitHub repository.  Go ahead and check it out, err… git clone it out.  The facecube.py script requires the libfreenect from the unstable branch and any recent version of pygame, numpy, and scipy.  You’ll need any recent version of MeshLab or Blender after that to do the meshing.  I’ve been using this on Ubuntu 10.10, but it should work without much trouble on Windows or OS X.  The latest code will be on git, but if you are averse to it for whatever reason, I’ve attached the script and the meshlab filter script below.  Since Thingiverse is the place for this sort of thing, I’ve also posted it along with some sample objects as thing:6839.

Download:
git clone git@github.com:nrpatel/FaceCube.git

facecube.py
meshing.mlx

13 Comments on FaceCube: Copy Real Life with a Kinect and 3D Printer

AC Powered Heated Build Platform for RepRap

Heated build platform

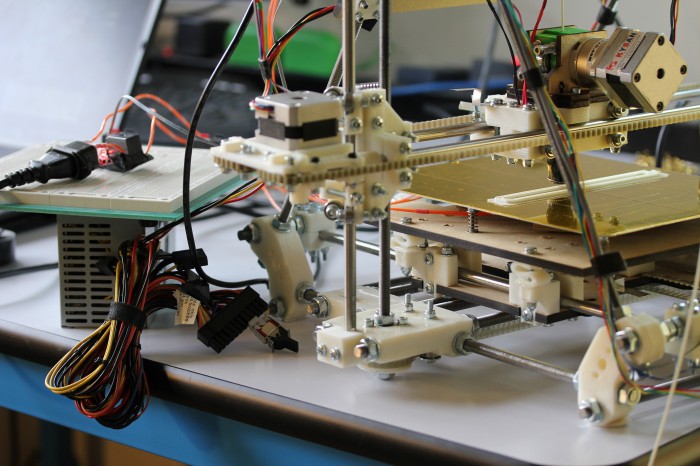
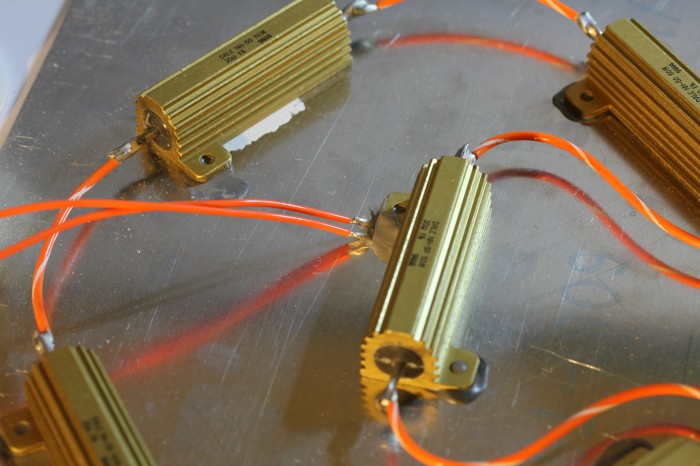
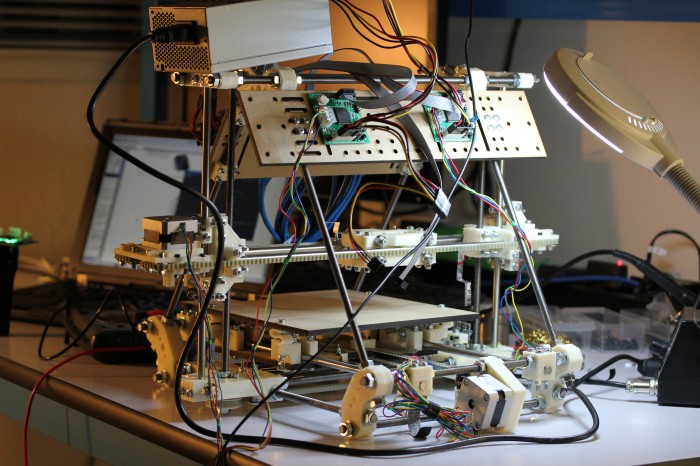
One of the unpleasant surprises you come across when first learning how to operate a RepRap is that any object longer than an inch or so in any dimension printed in ABS will warp quite a lot as the lower layers cool.  The workaround, other than switching to another plastic, is to print onto a heated build platform.  There a few varieties available to buy, but I decided to build one out of parts I could get at Halted.  I found a ~2mm thick sheet of aluminum in roughly the correct dimensions with holes predrilled for $2, and a few 50 watt resistors for about $2 each.

Thermistor

My primary design goal was to avoid putting more load on my (fused) RAMPS board and mini-ATX power supply by directly powering the bed off of AC.  As a purely resistive load, this is also by far the most efficient way of doing it.  I connected the resistors in series with 16 gauge high temperature teflon insulated wire and JB-Welded them to the sheet.  I also used JB-Weld to mount a thermistor near the middle resistor to get temperature readings.  I then mounted the board on springs above the normal build platform and covered the surface with Kapton tape.  The relay is being switched by one of the MOSFETs on the RAMPS board.  A red LED indicates that the relay is powered, and there is a flyback diode across the relay coil.  The Arduino Mega was resetting randomly partway through prints until I added a decoupling capacitor in parallel to the coil as well.
Schematic

Overall, it works well.  With roughly 80 watts of power, it heats up to 110C in around 5 minutes, which is sufficient for ABS.  I managed to print a 150mm long object with no warping.  I’ve also been using it with PLA at 60C.  Right now it poses a mild electrocution hazard sitting on my desk, but I plan on printing out an enclosure for it as soon as I figure out how to use OpenSCAD.

3 Comments on AC Powered Heated Build Platform for RepRap

Easy Interactive Camera-Projector Homography in Python

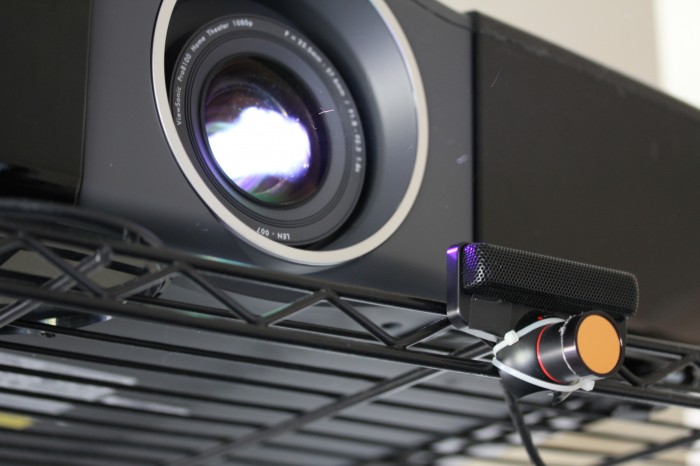
Camera and Projector

Math.  It turns out its not quite like riding a bike.  A year since college, and two since my last computer vision course, my knowledge of linear algebra is basically nil.  Several projects I’m stewing on are bottlenecked on this.  I decided to relearn some basics and create a tool I’ve wanted for a while, a method to quickly and easily calculate the homography between a camera and a projector.  That is, a transformation that allows you to map points from the camera plane to the display plane.  This opens up a world of possibilities, like virtual whiteboards and interactive displays.

I won’t go into detail about deriving the transformation matrix, as there is information elsewhere better than I could present.  The calculation requires four or more matching point pairs between the two planes.  Finding the points manually is a pain, so I wrote a script that uses Pygame and NumPy to do it interactively.  The script works as follows:

  1. Point an infrared camera at a projector screen, with both connected to the same computer.
  2. Run the script.
  3. Align an lit IR LED to the green X on the projector screen, and press any key.
  4. Repeat step 3 until you have four points (or more, depending on the script mode), at which point,
  5. The script will calculate the homography, print it out, and save it as a NumPy file.

The script in its current form uses any Pygame supported infrared camera.  This today is likely a modded PS3 Eye or other webcam, unless you’re lucky enough to have a Point Grey IR camera.  I do not, so I hot glued an IR filter from eBay to the front of my Eye, that I may have forgotten to return to CMU’s ECE Department when I graduated.  Floppy disk material and exposed film can also function as IR filters on the cheap,  just be sure to pop the visible light filter out of the camera first.

It would be overly optimistic of me to believe there are many people in the world with both the hardware and the desire to run this script.  Luckily, due to the magic of open source software and the modularity of Python, individual classes and methods from the file are potentially useful.  It should also relatively straightforward to modify to accept other types of input, like a regular webcam with color tracking or a Wii Remote.  I will add the latter myself if I can find a reasonable Python library to interface one with.

Once you have the transformation matrix, you can simply dot the matrix with the point from the camera to get the corresponding point on the projector.  The blackboard script, demonstrated by my roommate above and downloadable below shows a use case for this, a drawing app using an IR LED as a sort of spray can.  The meat of it, to convert a point from camera to projector coordinates, is basically:

# use homogeneous coordinates
p = numpy.array([point[0],point[1],1])
# convert the point from camera to display coordinates
p = numpy.dot(matrix,p)
# normalize it
point = (p[0]/p[2], p[1]/p[2])

The homography.py script takes the filename of the matrix file to output to as its only argument.  It also has an option, “-l”, that allows you to use four or more points randomly placed around the screen, rather than the four corner points.  This could come in handy if your camera doesn’t cover the entire field of view of the projector.  You can hit the right arrow key to skip points you can’t reach and escape to end and calculate.  The blackboard.py script takes the name of the file the homography script spits out as its only argument.  Both require Pygame 1.9 or newer, as it contains the camera module.  Both are also licensed for use under the ISC license, which is quite permissive.

nrp@Mediabox:~/Desktop$ python homography.py blah
First display point (0, 0)
Point from source (18, 143). Need more points? True
New display point (1920, 0)
Point from source (560, 137). Need more points? True
New display point (0, 1080)
Point from source (32, 446). Need more points? True
New display point (1920, 1080)
Point from source (559, 430). Need more points? False
Saving matrix to blah.npy
 array([[  3.37199729e+00,  -1.55801855e-01,  -3.84162860e+01],
       [  3.78207304e-02,   3.41647264e+00,  -4.89236361e+02],
       [ -6.36755677e-05,  -8.73581448e-05,   1.00000000e+00]])
nrp@Mediabox:~/Desktop$ python blackboard.py blah.npy

Download:
homography.py
blackboard.py

6 Comments on Easy Interactive Camera-Projector Homography in Python

Normal people don’t have these problems

Auxilliary Input

I drive the least interesting car in the world, a gray 2004 Toyota Camry.  To stave off death from boredom while driving, I use a tape adapter connected to an A2DP receiver to wirelessly listen to music from my iPhone.  A few weeks ago, the tape deck developed an extremely irritating clicking noise.  The easy options, the ones that most Camry owners would choose, would be to turn on the radio, get an FM transmitter for the iPhone, listen to CDs, or just let the tape deck click.  Being an engineer, I refuse pick the easy option, but rather the one that seems best, which inevitably devolves into a weekend of hacking, cursing, and setting things on fire, with a best case of eventually restoring the object of interest to something resembling a functioning state.

The plan was to enable direct auxiliary input, which the Internet claimed was possible on this model.  The backup plan was to resolve the clicking noise by just unplugging the tape motor, which we assumed was unnecessary to operate the adapter.  My roommate Will and I popped the head unit out of the car with much effort and two trips to the hardware store.  Apparently stealing a radio isn’t easy, even from your own car.

Attempting to power the unit off of the 12v rail of a 350w ATX power supply resulted in it shutting off immediately.  With a 450w PSU connected to the battery and accessory voltage lines, a tiny laptop speaker from my spare parts bin connected to the massive amp, and another speaker being used as an antenna, we managed to pull in the beautiful sound of late 70’s hits on FM radio.

I’m not entirely sure what happened, but Will managed to break the tape deck in about a dozen different ways over the course of the next couple of hours.  It wouldn’t play at all without the drive gears spinning, it refused to eject tapes because it believed it was empty, and still, the clicking gear clicked.

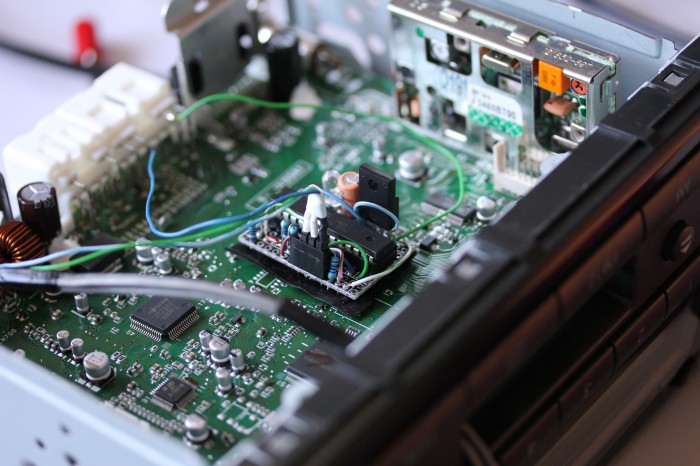
It was then up to me to get aux in working.  Apparently, Toyotas from around my model year use AVC-Lan, a communications bus based on IEBus for the head unit to connect to things like a CD changer.  There is some pretty solid research across the web on how to emulate a device on the bus to message the head unit to use its aux input.  I used the circuit and software from SigmaObjects, as it required only parts I already had or could get from Halted.  The code there is designed for an ATmega8, but with some trial and error, I managed to port it to the current ATmega48/88/168 series.  Unfortunately, the code doesn’t mention being under any permissive license, so I can’t share my modifications.

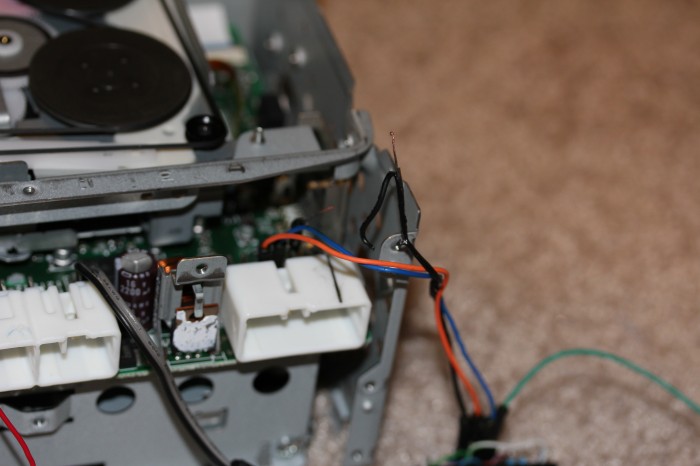
While hooking it up to the head unit, the wire connecting the device to ground actually burst into flames, burning part of a connector and melting copper.  On later inspection, we found that the wires were extremely high gauge internally, and it is likely that only a single thin strand was carrying the current in the area that caught fire.  Miraculously, neither the radio nor the ATmega168 was damaged by the incident.  I switched to lower gauge higher quality wire, checked my car insurance terms relating to explosion due to user error, and continued.

Burnt Wire

After a few more hours of debugging, I realized that I had the two data lines backwards, and after switching them it worked instantly.  We repurposed the TAPE button to switch to aux in.  I taped the board down, put the head unit back together, and we stuck it back into the car.  There was an unnerving startup delay the first few times, but I am now the proud owner of a gray 2004 Toyota Camry with auxiliary audio input… and no tape deck.

11 Comments on Normal people don’t have these problems

Using the TI MSP430 LaunchPad with Ubuntu 10.04

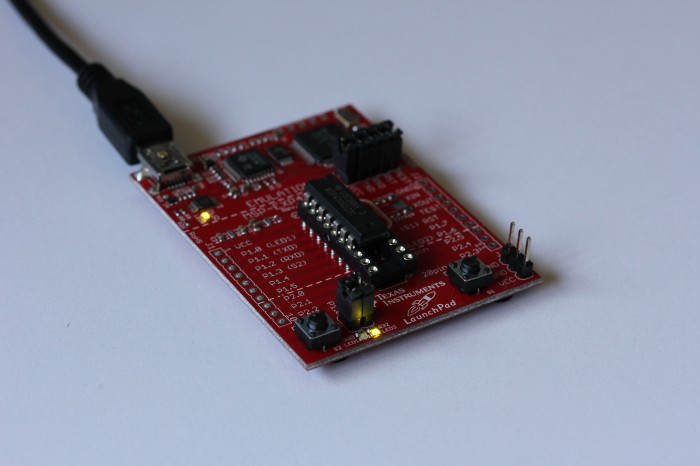
TI MSP430 LaunchPad

The Arduino and the massive community around it have made AVR the de facto standard for hobby microcontrollers, despite the aloofness of Atmel to take advantage of it.  TI apparently decided that they wanted a piece of the pie, so they took a peek at the Arduino recipe and are now selling something that looks a whole lot like it for a fraction of the price.  The TI MSP430 LaunchPad ships with a MSP430G2231 and a MSP430G2211, microcontrollers sourced from TI’s Value Line.  The first, with I²C, SPI, ADCs, PWM, and UART, is a capable Arduino replacement for physical computing, though the latter chip is limited mostly to GPIO.  Unfortunately, both are a bit anemic when it comes to Flash and RAM.  TI’s roadmap shows promise regarding this issue.

The big problem though, is software.  The appeal of Arduino is largely that it has a dead simple to use, cross platform IDE, running on the well maintained and supported avrgcc and avrdude.  TI’s solution, on the other hand, is a set of two Windows-only, registration-required, code-limited, IDEs.  Linux and Mac users are left a little high and dry.  Luckily, there are some projects, new and old, that make it work out.

You can follow the instructions at mylightswitch to install MSPGCC4 and mspdebug, neither of which is in the Lucid repositories.  MSPGCC is an MSP430 port of the GCC toolchain, complete with GDB.  mspdebug lets you program and erase the flash on the LaunchPad, among many other things.  There are some usage instructions for it at Ramblings and Broken Code.  True to its name, the guide is partially broken.  To use the LaunchPad with mspdebug 0.9, you have to specify the driver instead of using -R.  In our case, we want to use the following:

mspdebug rf2500

Ideally, we would be able to use the uif driver that the eZ430U and other TI development boards use.  Unfortunately, the LaunchPad is incompatible with the firmware used with the ti_usb_3410_5052 module that comes with Linux.  There is a really amazing three part series on this at Travis Goodspeed’s blog.

While it is indeed possible to use the LaunchPad and MSP430 devices in general in Linux, I’m going to stick with the trusty AVR/Arduino combo for now.

11 Comments on Using the TI MSP430 LaunchPad with Ubuntu 10.04

Projecting Virtual Reality with a Microvision SHOWWX

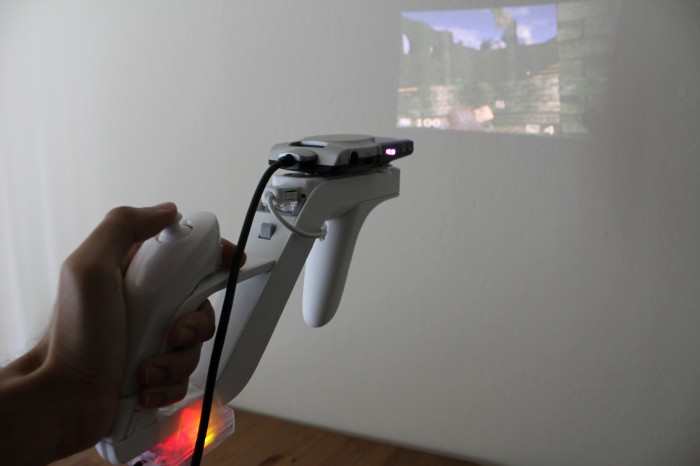
It’s bit of a stretch to call this Virtual Reality, in capitals no less, but I can’t think of another noun that fits it better.  This is the idea I have been hinting about, sprouted into a proof of concept.  By combining the stable positioning of the SpacePoint Fusion with the always in focus Microvision SHOWWX picoprojector, one can create a pretty convincing glasses-free virtual reality setup in any smallish dark room, like the bedroom in my Bay Area apartment.

Projecting Virtual Reality

This setup uses the SpacePoint to control the yaw, pitch, and roll of the camera, letting you look and aim around the virtual environment that is projected around you.  A Wii Remote and Nunchuk provide a joystick for movement and buttons for firing, jumping, and switching weapons.  All of the items are mounted to a Wii Zapper.  For now, it is annoyingly all wired to a laptop I carried around in a backpack.  Eventually, I’m planning on using a BeagleBoard and making the whole projector/computer/controller/gun setup self-contained.

The software is a hacked version of Cube, a lightweight open source first person shooter.  It’s no Crysis 2, but it runs well on Mesa on integrated graphics, and it’s a lot easier to modify for this purpose than Quake 3.  Input is via libhid for the SpacePoint and CWiid for the Wiimote.  All in all, it actually works pretty well.  The narrow field of view and immersiveness (a word, despite what my dictionary claims) makes playing an FPS quite a bit scarier for those who are easily spooked, like yours truly.  There is some serious potential in the horror/zombie/velociraptor genres for a device like this, if anyone is interested in designing a game.

This is just the start, of course.  I know I say that a lot, and there are about a dozen projects on this blog I’ve abandoned, but I think this one will hold my attention for a while.  I hate showing off anything without source code, so even though it will likely not be useful to anyone, I’ve attached the patch against the final release of Cube.

Download:
projecting.diff

27 Comments on Projecting Virtual Reality with a Microvision SHOWWX

A Pragmatic Workaround for Perpetual Copyright

To promote the Progress of Science and useful Arts, by securing for limited Times to Authors and Inventors the exclusive Right to their respective Writings and Discoveries.

Article I, Section 8, Clause 8, United States Constitution

One of the few Congressional powers specifically enumerated in the Constitution over two hundred years ago allows for the protection of intellectual property rights for a limited period of time.  Limited is, like much of the Constitution, intentionally vague.  In theory, depending on the whims of the judiciary in place, limited could be defined as anything up to the heat death of the universe.  Recent judgments put this within the realm of possibility.  I will not use this space as a discussion (rant) about copyright law or reform, mostly because there are much better and more interesting places to read about that.  I will, however, describe my experiences as a user of copyright and propose a workaround for some of its woes.

The Copyright Act of 1976, as confirmed in Kahle v. Gonzales, changed copyright from an opt-in system requiring registration to an opt-out system, in which any copyrightable work is automatically copyrighted upon publishing.  That means that without any intervention on my part, under current copyright law and assuming no further extensions, this blog post will enter the public domain April 25th, 2080 if I croak immediately after hitting the Publish button.  As my red meat intake has been limited recently and Congress is still in the pocket of big business, I expect the actual date will be much later.

Many rightly find this unreasonable, hence the rise of the copyleft and free culture movements.  Practically perpetual copyright isn’t so bad when the work is opened by a permissive license like Creative Commons Attribution or three clause BSD or a reciprocal license like the GPL.  Or is it?  If in 2134, a brain hacking hobbyist decides she wants to repurpose and distribute a Python game I wrote in 2009 as a retro eyesaver, should she really have to include the ISC license stating that my corpse disclaims all warranties including implied warranties of merchantability and fitness?  I argue that in a sane society, she should not, as the work would long have been in the public domain.  However, the license I attached to the work will remain valid for the entire absurd length of its copyright.

I propose a simple workaround for this problem: a self-destruct wrapper for licenses.  That is, a legal instrument by which the owner of a work can specify that he or she voluntarily and automatically relinquishes the work into the public domain after a specific number of years.  This is à la carte copyright, in which the creator may choose a length that seems sane, like the 14 years we started with in 1790.  This also has the effect of trumping any further extensions Congress may enact to keep Steamboat Willie in the vault, preventing a work I publish today from remaining under copyright in 3010.  One could use such a wrapper on any license, permissive, reciprocal, or restrictive.  An individual or company could profit from a work for a period of time of their choosing, and automatically grant it to the betterment of society at the self destruct date of the license.  A software developer can protect a piece of code from going proprietary with the GPL today without forever limiting projects that use it to a copyleft license.  I could protect myself from exploitation by marking a photograph I’ve taken as CC by-nc-nd for now without preventing its public use long after my death.

I can’t even pretend to be a lawyer, but here’s a proof of concept ripped from a piece of the Creative Commons Zero license.

/*
Upon the date of publication, the License shall be deemed effective.  Upon
X years from the date of publication, the Waiver shall be deemed effective.
 
Waiver:
To the greatest extent permitted by, but not in contravention of, applicable
law, Affirmer hereby overtly, fully, permanently, irrevocably and
unconditionally waives, abandons, and surrenders all of Affirmer's Copyright
and Related Rights and associated claims and causes of action, whether now
known or unknown (including existing as well as future claims and causes of
action), in the Work (i) in all territories worldwide, (ii) for the maximum
duration provided by applicable law or treaty (including future time
extensions), (iii) in any current or future medium and for any number of
copies, and (iv) for any purpose whatsoever, including without limitation
commercial, advertising or promotional purposes (the "Waiver"). Affirmer makes
the Waiver for the benefit of each member of the public at large and to the
detriment of Affirmer's heirs and successors, fully intending that such Waiver
shall not be subject to revocation, rescission, cancellation, termination, or
any other legal or equitable action to disrupt the quiet enjoyment of the Work
by the public as contemplated by Affirmer's express Statement of Purpose.
 
License:
...
*/

Since I am not a lawyer, I have no idea if a self-destructing license is legally possible.  I would like to get lawyerly advice on the idea before I start attaching it to my projects, but this is certainly something I plan on using.  Hopefully it appeals to others too.  Since the bug fix for perpetual copyright isn’t coming any time soon, this workaround will have to do.

No Comments on A Pragmatic Workaround for Perpetual Copyright